User and maintenance guide for plastic windows with VarioTec fittings


SCHÜCO plastic elements are characterised by:
· ease of use;
· excellent thermal insulation properties;
· excellent sound insulation properties;
· long service life.
To maximise the life of your SCHÜCO plastic windows, please read the user and maintenance guide carefully before use.
If you cannot find the answers to any questions you may have in this user guide, please contact your SCHÜCO plastic window manufacturer.
1. After installation
Drilling debris and bits of mortar may damage the surfaces of window elements and prevent the window from functioning properly. The framing and all moving parts must be cleaned of debris immediately.
Note! After installation the window must be kept closed for 24 hours.
· Remove the installation blocks (orange).
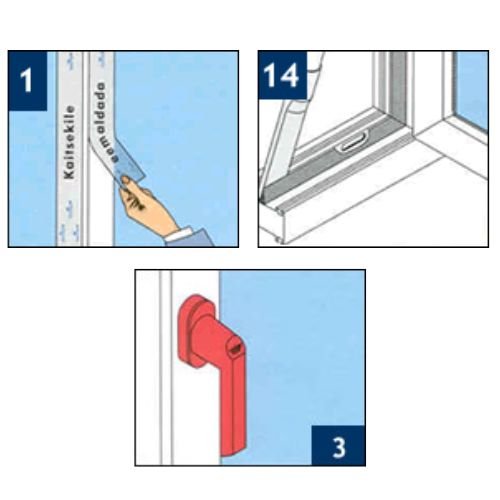
· The protective film must be removed from the framing no later than after 6 months (Figure 1).
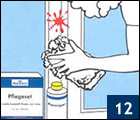
· Carefully remove any fresh plaster or mortar residue using a sponge and water (Figure 12).
· Remove any loose plaster or mortar residue and milling debris using a vacuum cleaner (Figure 14).
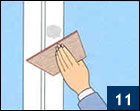
· Remove any stuck plaster or mortar residue and other debris using a wooden or plastic putty knife (Figure 11).
· Apply protectants to the framing and seals of the window (Figure 15).
Note! During the finishing (rendering, painting, etc.) of the window reveals, the window must be kept closed to prevent the finishing material (e.g., render or plaster) from getting into the moving parts of the window (Figure 2). In the case of failure to comply with the instructions above, the warranty granted for the windows becomes void.
2. Use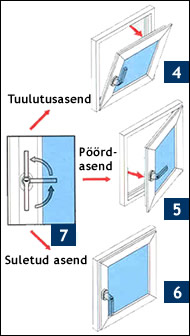
Micro-ventilation button on the window frame side
For easier operation, push gently on the sash when opening or closing the window.
Note! Do not change the position of the handle when the window is open.
2.1.Opening a tilt & turn window (Figure 7)
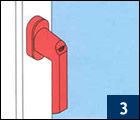
Push gently on the handle (Figure 3).
To open the window using the turn function, turn the handle into the horizontal position (Figure 5) – the window will swing open.
To open the window using the tilt function, turn the handle into the vertical position (Figure 4) – the window will tilt open for ventilation.
To change from swung open to tilted open or vice versa, you must first close the window (Figure 6).
2.2. Micro-ventilation (available for an extra fee)
If your window is equipped with a micro-ventilation button, the sash can also be partially opened to provide a constant inflow of fresh air (Figure 8).
Note! To activate micro-ventilation, the window must be in the ventilation position.
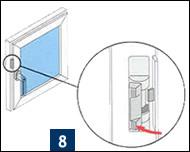
· Micro-ventilation button on the opened sash side = micro-ventilation is enabled.
· Micro-ventilation button on the window frame side = micro-ventilation is disabled.
2.3.Window security
Windows are secure when closed only if the handle is turned to the end position, and if the handle is locked if equipped with security fittings.
3.1. General instructions
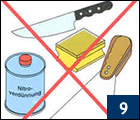
Windows MUST NOT be cleaned using:
· sharp tools (knives, metal putty knives, steel wool, etc.) that may damage the surface of the window (Figure 9);
· aggressive cleaning agents or solutions (nitro solvent, nail polish remover, etc.) that may cause permanent damage to the surface of window elements.
3.2. Normal soiling
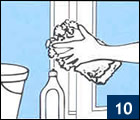
As part of window maintenance, the framing and seals of your windows should be cleaned each time the window is washed. Use a soft, non-abrasive detergent – do not clean the plastic parts of the window with, for example, laundry powder (Figure 10).
Remove plaster, mortar and other residue with a wooden or plastic putty knife (Figure 11).
· Oil and paint residue
· Nicotine or rust stains
· Ball-point or felt-tip pen marks
Remove stains using the maintenance kit (Figure 12).
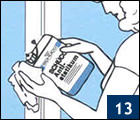
Wiping the window with a dry cloth generates static electricity. This leads to faster soiling of the window. To avoid static charge, use an anti-static agent (Figure 13).
In addition to regular cleaning, it is recommended to inspect your plastic windows once a year. This helps ensure a long and problem-free service life for your windows.
Remove dust and dirt from between the exterior side of the sash and the seal using a vacuum cleaner. Clogged drainage slots can be cleaned using a strip of wood or plastic (Figure 14).
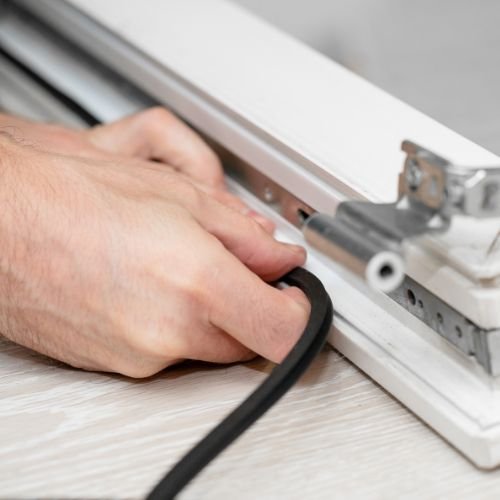
Lubricate all seals using a grease stick or petroleum jelly. This helps retain their elasticity and prevent sticking (Figure 15).
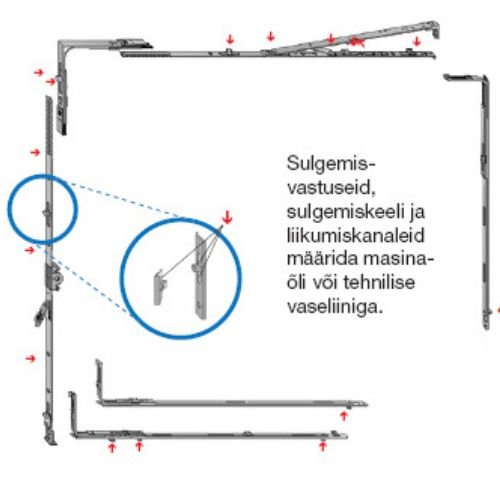
All moving parts of your SCHÜCO window are virtually maintenance-free; however, a drop of acid-free oil and a smidge of acid-free lubricant will keep the mechanism moving freely and ensure its long service life. To lubricate the parts, apply just a thin coat of oil. Remove any excess lubricant to avoid soiling (Figure 16, 17).
5. Sash adjustments (minor adjustments)
Over time, environmental effects can impact the mechanisms of your plastic windows and lead to poor functioning. The instructions below should help you perform minor adjustments independently.
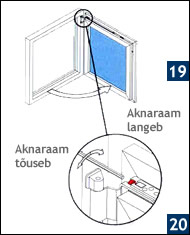
5.1. Handle side of the sash collides with the frame at the bottom (Figure 18)
Tool: 4 mm hex key.
Solution: raise the sash.
• Swing open the window (Figure 19).
• Adjust the sash (Figure 20).
Turn clockwise = sash rises
Turn counterclockwise = sash lowers
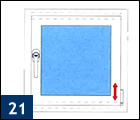
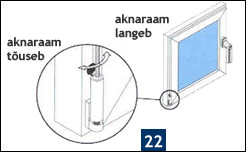
Problem: sagging of the sash.
Tool: 4 mm hex key.
Solution: raise the sash.
• Remove the protective cap from the lower corner hinge.
• Adjust the screw in the corner hinge (Figure 22).
Turn clockwise = sash rises
Turn counterclockwise = sash lowers
6. Consultation and repair
For additional information, contact your SCHÜCO window manufacturer. Your SCHÜCO window manufacturer will also assist you with any adjustment and repair work.
7. Warranty
7.1. The warranty is valid only if:
• the window is installed in the aperture in accordance with building regulations;
• the customer is able to submit the manufacturer’s warranty slip (order confirmation, etc.).
7.2. The warranty will be void if:
• the user guide for the SCHÜCO plastic windows has not been complied with:
• the window or window parts (glass, fitting, handle, hinges, etc.) have been broken as a result of mechanical damage;
• the window has been installed incorrectly (non-compliance with building regulations).
See also: Corona plastic windows